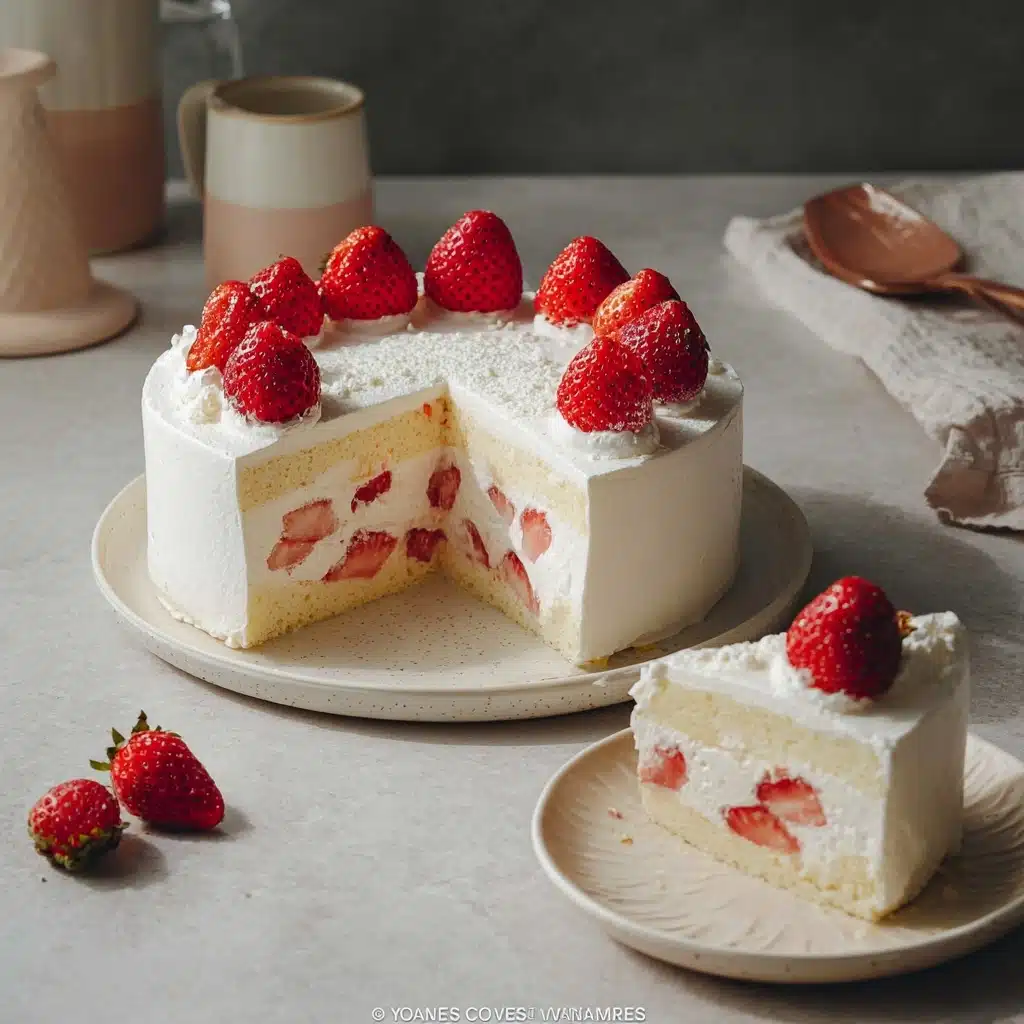
There’s something truly magical about a Japanese Strawberry Cake. Imagine impossibly fluffy slices of vanilla sponge, layered with fresh, sweet strawberries and enrobed in clouds of silky whipped cream. Each bite is refreshing and airy, balancing pure, fruity brightness against the most tender cake crumb. This dessert is a star at Japanese bakeries for good reason, and learning to make it at home means you can bring that slice of happiness right to your own table. The best part? With a few careful steps and some simple ingredients, you’ll soon be surrounded by the sweet aroma of this beloved cake—ready to wow friends and family!
Ingredients You’ll Need
Every element of this cake plays its part—each ingredient is carefully chosen to create that iconic fluffy texture, delicate flavor, and the vibrant “wow” factor of a true Japanese Strawberry Cake. Here’s what you’ll need, along with some little tips to ensure your cake tastes (and looks) like it’s straight from a Tokyo bakery!
- Whole Milk: Adds richness and helps create a soft, tender crumb—don’t skip this for the finest texture.
- Unsalted Butter: Lends a subtle dairy flavor and a melt-in-your-mouth quality to the sponge.
- Cake Flour: The secret to that feather-light crumb—using cake flour is a must for true Japanese Strawberry Cake.
- Egg Yolks: Contribute color and great structure, making each layer just the right amount of sturdy and airy.
- Egg Whites: Whipped up, they transform the cake base into a pillowy cloud by adding classic Japanese sponge lift.
- Sugar: Sweetens the cake and helps both tenderize the crumb and stabilize the meringue—use caster sugar if you can for better dissolving.
- Strawberries: The star of the show, offering juicy, tangy-fruity bursts in every layer—make sure they’re ripe!
- Heavy Whipping Cream: Essential for making the signature light-as-air frosting that wraps the entire cake in luxury.
- Confectioners Sugar: Adds sweetness to the whipped cream without making it gritty; it dissolves like a dream.
- Gelatin (Optional): Helps stabilize the cream for professional-looking slices; skip it for a softer, more ethereal texture.
- Cold Water (Optional): Dissolves the gelatin, if you’re opting for stabilized cream.
- Sugar for Syrup: Makes a simple syrup to keep those tender cake layers moist and luscious.
- Hot Water (for Syrup): Helps the sugar dissolve evenly, making a quick and easy cake soak.
How to Make Japanese Strawberry Cake
Step 1: Prepare Your Cake Pan and Preheat the Oven
Start by lining an 8-inch round cake pan with parchment paper, making sure the bottom and sides are well-covered. Preheating your oven to 325°F (160°C) sets the stage for a slow, gentle bake—crucial for achieving a fluffy, moist crumb. If you’re using a springform or removable-bottom pan, wrap the outside with multiple layers of foil to make it watertight, since you’ll bake this cake in a water bath.
Step 2: Create the Sponge Batter
In a heatproof bowl, combine the milk and unsalted butter, microwaving until the mixture is just melted. Stir it together, then sift in your cake flour—this little step helps the sponge stay ultra-light. Gently mix until everything’s silky smooth. Next, add your egg yolks and stir until the mixture becomes pale and cohesive—this forms the rich base of your Japanese Strawberry Cake.
Step 3: Whip the Egg Whites
In a spotlessly clean bowl, whip the egg whites at medium-high speed. Once frothy, gradually add the sugar, continuing to beat until you reach glossy, medium peaks that just hold their shape. This meringue is the heart and soul of the sponge, lending the incredible lightness Japanese Strawberry Cake is famous for!
Step 4: Combine and Fold
Gently fold one-quarter of the egg white mixture into the yolk base—this step lightens the batter and makes it easier to fold. Then carefully pour everything back into the remaining egg whites and fold until just combined. It’s essential not to overmix here; a delicate touch preserves the airiness for a pillowy finish.
Step 5: Bake in a Water Bath
Pour the batter into your prepared pan and give it a couple of gentle drops on the counter to remove any big air bubbles. Nestle the pan inside your larger water bath dish, pour hot water into the outer pan to about one inch up the side, and bake for 1 hour 30 minutes—no peeking for at least the first hour! Your patience pays off: the result is a Japanese Strawberry Cake with unbelievable height and lightness.
Step 6: Cool the Cake
Once baked, run a knife along the sides to prevent sticking, then tip the cake onto a wire rack to cool completely. Let it rest until no warmth remains; this ensures easy, clean slicing and perfect layering later on.
Step 7: Macerate the Strawberries and Make Cake Syrup
While your cake cools, slice up most of your strawberries and toss with a bit of sugar. Let these sit for an hour or more—they’ll become delightfully syrupy, perfect for layering. In a small bowl, mix sugar and hot water to make a simple syrup, then, if you want extra strawberry punch, add the reserved juices from your macerated berries to the syrup. This adds both strawberry flavor and a hint of gorgeous color to your cake layers.
Step 8: Whip the Cream Frosting
Next, make the whipped cream. For a stabilized version, soak the gelatin in cold water, dissolve it gently, then combine with a bit of whipped cream before folding everything together. For classic, ultra-light cream, just whip the heavy cream and confectioners sugar until soft (for stabilized) or firm (for unstabilized) peaks form. Watch closely to keep the texture dreamy and not over-whipped!
Step 9: Assemble the Cake
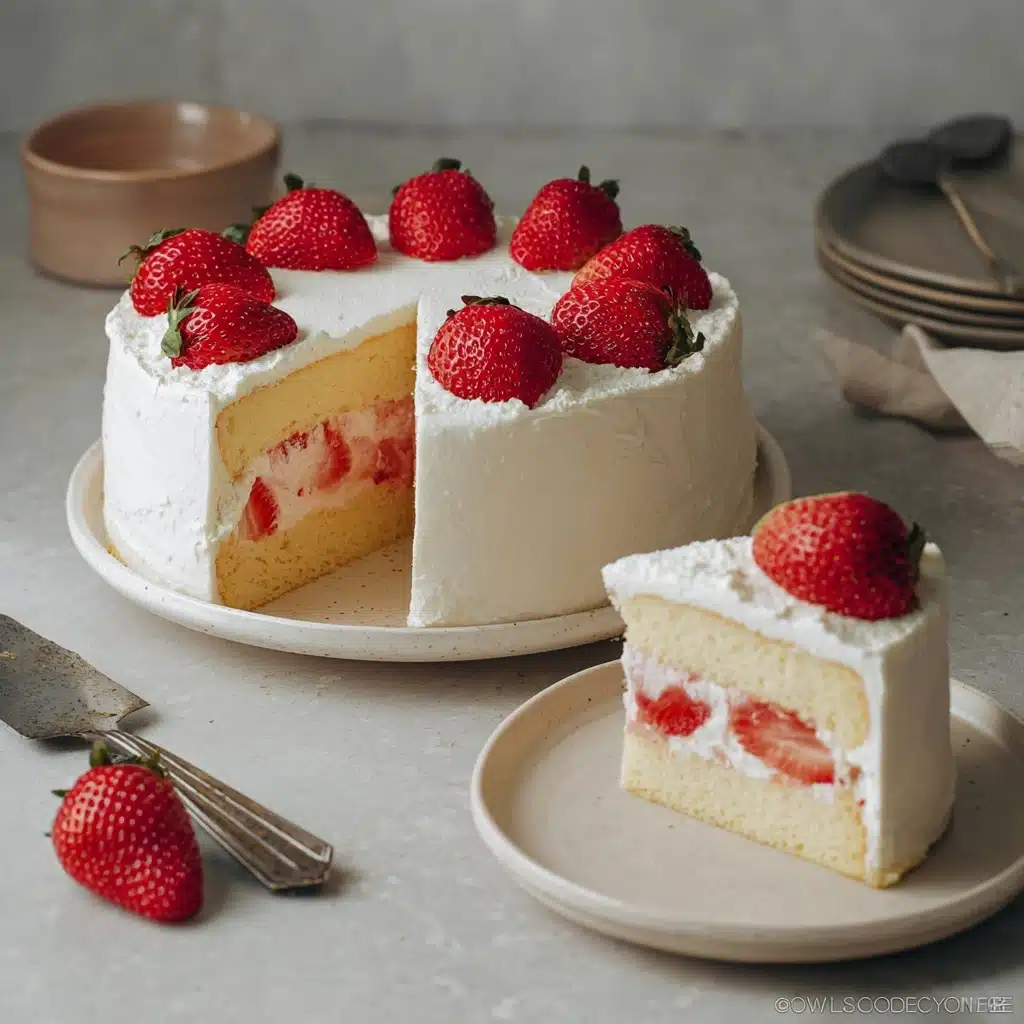
Once your cake is cool, level off the top (removing any browned bits), then slice horizontally to create two even layers. Brush each with the syrup, then spread a layer of whipped cream on the bottom half. Top generously with strawberries, add another thin layer of cream, and gently lay the second sponge on top. Cover the cake with more cream, smoothing it over the sides and top. Pipe decorative swirls if you’re feeling fancy, and arrange the remaining strawberries over the top for that iconic bakery look.
Step 10: Chill, Slice, and Serve
For stabilized cream, let the finished cake chill for at least 30 minutes in the refrigerator; for unstabilized cream, serve within a few hours for the freshest results. When you’re ready, slice with a serrated knife and savor your homemade Japanese Strawberry Cake—airy, dreamy, and irresistible!
How to Serve Japanese Strawberry Cake
Garnishes
The classic topping for Japanese Strawberry Cake is a generous crown of fresh strawberries, halved or sliced for beauty and brightness. If you want to go the extra mile, dust a little confectioners sugar over the top or add a few mint leaves for a burst of color. You can even pipe extra swirls of whipped cream around the edges for a truly celebration-worthy look. The key here is freshness—the fresher the berries, the more eye-catching (and delicious) your cake will be.
Side Dishes
Japanese Strawberry Cake is the showstopper at any table, so keep sides light and subtle. Pair each slice with a cup of green tea or delicate herbal infusions like chamomile. If you want to keep the experience entirely Japanese, serve alongside a bowl of fresh fruit or a petite fruit salad—something that complements, not competes with, your beautiful cake.
Creative Ways to Present
For an unforgettable presentation, assemble the cake on a pretty cake stand and decorate it with edible flowers alongside the strawberries. Another charming option is to bake mini Japanese Strawberry Cakes in individual molds—perfect for parties or as charming afternoon tea treats. If you’re feeling daring, you could use a clear cake collar and build vertical layers for a modern twist, revealing the gorgeous cross-section for all to admire.
Make Ahead and Storage
Storing Leftovers
Wrap any leftover Japanese Strawberry Cake loosely in plastic wrap or store it in an airtight container in the refrigerator. The cake will keep well for up to 2 days—thanks to the moist sponge and stabilized cream (if using), the texture remains soft and not dry. Just be sure to refrigerate promptly to keep the cream and berries fresh and safe.
Freezing
While best savored fresh, you can freeze Japanese Strawberry Cake if you have extra slices. Wrap individual pieces tightly in plastic wrap and then a layer of foil. Freeze for up to 1 month. When you want to enjoy, thaw in the refrigerator overnight; the texture of the cream may change slightly, but the flavor will still be divine. For best results, freeze without the strawberries on top, then add fresh berries after thawing.
Reheating
This cake is served chilled or at room temperature, so there’s no need for traditional reheating. Simply let it sit out briefly if you prefer a softer bite (especially with stabilized cream), about an hour before serving. This brings out the flavor and ensures the sponge and cream are at their best, while keeping the strawberries juicy and vibrant.
FAQs
Can I make Japanese Strawberry Cake without gelatin?
Absolutely! Gelatin is just for stabilizing the whipped cream. If you leave it out, the cream will be softer and more ethereal—just frost and assemble the cake right before serving for best results.
What’s the difference between cake flour and all-purpose flour in this recipe?
Cake flour creates a much finer, softer crumb, which is key to nailing the signature texture of a Japanese Strawberry Cake. All-purpose flour will make your cake denser and less cloud-like, so stick with cake flour for the best experience.
How do I prevent my whipped cream from becoming over-whipped?
Watch the cream closely as you whip it! Stop at soft-to-medium peaks (especially if stabilizing); the second you see the cream holding its shape and not slumping, it’s ready. Over-whipped cream turns grainy and can begin to separate—if this happens, add a splash more cream and gently fold to loosen.
Can I use other fruits besides strawberries?
Definitely! While strawberries are classic, you can substitute other soft, sweet fruits Print
Japanese Strawberry Cake Recipe
- Prep Time: 1 hour
- Cook Time: 1 hour 30 minutes
- Total Time: 3 hours 30 minutes
- Yield: 8 servings
- Category: Desserts
- Method: Baking
- Cuisine: Japanese
- Diet: Vegetarian
Description
This Japanese strawberry cake is the ultimate bakery-style treat: an incredibly light, fluffy sponge layered with sweet, juicy macerated strawberries and a whipped cream frosting that’s beautifully airy and never overly sweet. It delivers an authentic taste of Japanese celebrations, with every bite reminiscent of biting into a cloud. Whether you opt for the stabilized or traditional whipped cream, this showstopper cake is a dreamy dessert for any occasion.
Ingredients
Cake
- 80 g (1/3 cup) whole milk
- 50 g (3 1/2 tablespoons) unsalted butter
- 75 g (1/2 cup + 1/2 tablespoon) cake flour
- 4 large egg yolks
- 4 large egg whites
- 70 g (5 1/2 tablespoons) sugar (preferably caster sugar)
Strawberries
- 12 oz to 1 lb (340 g to 450 g) strawberries, divided
- 1 1/2 teaspoons sugar
Whipped Cream Frosting
- 280 g (10 oz) heavy whipping cream
- 2 tablespoons confectioners sugar
- 3/4 teaspoon gelatin (optional, for stabilized cream)
- 2 tablespoons cold water (optional, for stabilized cream)
Cake Syrup
- 2 tablespoons sugar
- 3 tablespoons hot water
Instructions
- Prepare the Cake: Line the bottom of an 8” round cake pan with parchment paper. Preheat your oven to 325°F (160°C). Set up a water bath by preparing a high-walled pan fitting your cake pan and boil water to cover 1 inch up the sides. If using a springform pan, wrap the outside in foil to prevent water leakage.
- Make the Batter: In a medium heatproof bowl, microwave milk and butter together until melted and stir to combine. Sift in cake flour and mix gently until smooth, then add egg yolks and mix evenly.
- Beat Egg Whites: In a clean mixing bowl, beat egg whites at medium-high speed until frothy. Gradually add sugar while beating, continuing until glossy, medium peaks form.
- Combine Mixtures: Gently fold 1/4 of the whipped egg whites into the yolk mixture until smooth. Pour this mixture back into the remaining whites and continue to fold gently just until combined and smooth. Avoid over-mixing.
- Bake: Pour batter into the lined cake pan. Drop the pan from about 5 inches to release air bubbles. Place the pan in the prepared water bath, add hot water, and bake for 1 hour 30 minutes. Test doneness with a skewer. Cool completely on a rack before decorating.
- Macerate Strawberries: While cake cools, slice 8 oz (225 g) strawberries into 1/4″ slices. Toss with 1 1/2 teaspoons sugar in a bowl, and let sit at least 1 hour (up to 2) until glossy and juicy. Reserve any juices left.
- Make Cake Syrup: Stir together 2 tablespoons sugar and 3 tablespoons hot water until dissolved. Optionally mix in reserved strawberry juice for added flavor and a pink tint.
- Prepare the Cream: (For Stabilized Cream): Bloom gelatin in 2 tablespoons cold water for 5 minutes, then heat briefly to melt. Whip heavy cream with sifted confectioners sugar to very soft peaks. Mix a scoop into the melted gelatin, combine, then drizzle back in and whip briefly to soft peaks. (For Regular Cream): Whip heavy cream with confectioners sugar to firm peaks.
- Slice and Syrup the Cake: Once cooled, trim the cake’s top and divide it into two even layers. Place the top layer (cut-side down) on your cake stand and brush with syrup. Brush the other layer upside-down with syrup as well.
- Layer with Cream and Strawberries: Spread a generous, even layer of whipped cream over the bottom cake layer. Arrange sliced strawberries evenly on top, then cover strawberries with another thin layer of cream.
- Finish Assembly: Place the second cake layer on top. Spread a layer of cream on top and over the sides, using extra cream as needed for smooth coverage. Add a final, thicker layer of cream on top and smooth the sides. If desired, pipe decorations with leftover cream and garnish with the remaining strawberries.
- Chill and Serve: If using stabilized cream, refrigerate the cake for at least 30 minutes to set the cream. If using regular whipped cream, serve immediately or chill briefly (up to a few hours). For best slicing, use a serrated knife. Enjoy at room temperature for a soft, melt-in-the-mouth texture.
Notes
- If you don’t have a spinning cake stand, place a flat plate or the removable bottom of a pie pan on an upside-down bowl for easier frosting.
- Skipping gelatin in the cream keeps this cake vegetarian and is just as delicious—the cake will simply need to be served sooner.
- Add any leftover strawberry liquid to the syrup for even more berry flavor and a lovely pink tint in the layers.
- Be gentle with folding and avoid over-whipping the cream for the lightest, airiest texture.
- This cake is best enjoyed within the day it’s made, especially if using unstabilized whipped cream.
Nutrition
- Serving Size: 1 serving
- Calories: 394 kcal
- Sugar: 17.1 g
- Sodium: 113 mg
- Fat: 27.7 g
- Saturated Fat: 16.2 g
- Carbohydrates: 31.9 g
- Fiber: 1.5 g
- Protein: 6.8 g
- Cholesterol: 192 mg

